Wiring a juniper bonsai should be done when the plant is actively growing, usually in the spring and summer. If wiring takes place during dormancy, this can cause permanent damage to the branches and leaves of the tree. The exact timing for wiring varies depending on whether your bonsai is an evergreen or deciduous variety, with evergreens typically needing to be wired sooner than deciduous trees. Junipers require very careful pruning throughout their growth period, so it’s important to time your wiring correctly in order to ensure that all pruning has been completed before any major training is undertaken.
Contents:
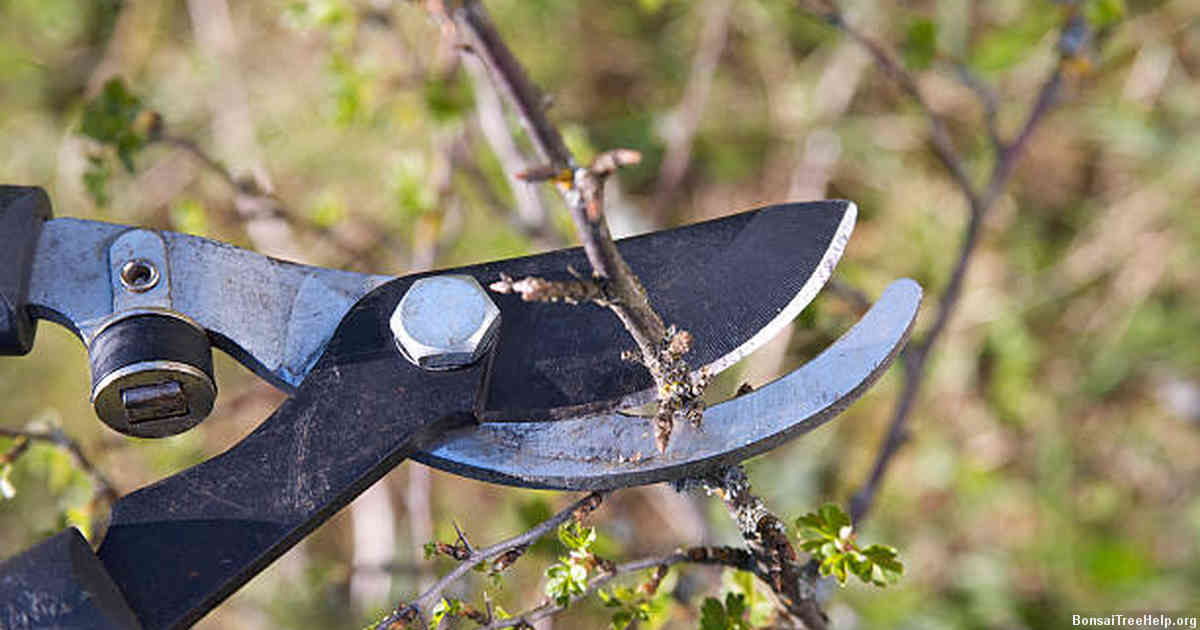
- Pruning Techniques for Juniper Bonsai
- Materials Needed for Juniper Bonsai Wiring
- Identifying the Right Time to Wire Your Juniper Bonsai
- Beginner’s Guide to Wiring a Juniper Bonsai
- Steps to Properly Wire Your Juniper Bonsai
- Maintaining Your Wired Juniper Bonsai: Tips and Tricks
- Common Mistakes to Avoid When Wiring Your Juniper Bonsai
Pruning Techniques for Juniper Bonsai

One of the most important pruning techniques for juniper bonsai is selective trimming. This involves carefully removing some of the new growth from branches and stems without causing harm to the tree’s overall shape. Through this method, you can easily control and maintain the desired look of your juniper bonsai. It is important to remember that when trimming any bonsai, you should focus on thinning out new shoots rather than cutting them off entirely. The process of trimming encourages small, delicate leaves on a single stem to give your plant an elegant appearance over time.
In addition to selective trimming, pinching back is another crucial technique used in juniper bonsai pruning. Pinched back segments will remain within their current structure; however, they can be replaced by younger sprouts with smaller leaves which contributes to a more natural-looking display in the future. It helps evenly spread out newer branches while at the same time managing larger shoots that may have become overly dominant in certain parts of your tree’s canopy. Utilizing these two pruning strategies in combination allows you to manipulate your juniper bonsai and create different levels of appeal as well as symmetry throughout its growth cycle over time.
Materials Needed for Juniper Bonsai Wiring

Wiring is one of the essential techniques in bonsai cultivation, particularly when shaping a juniper bonsai. If you have decided to wire your juniper bonsai, the first step is to acquire the necessary materials for wiring. This can be done either in person or online from gardening stores and specialized websites that sell bonsai supplies.
In addition to quality annealed aluminum wire, it’s also helpful to get some soft cloth for wrapping around exposed areas of your juniper tree where metal won’t adhere well enough. This will prevent damage to delicate bark and leaves on the branches as you work with them. Cutters are essential tools that allow you to customize lengths of wires as required while pruners will be necessary if additional pruning is needed before bending and shaping your juniper bonsai with wires.
When styling your Juniper Bonsai, having wooden sticks on hand allows you to provide added support by creating extra leverage points during its wiring process or inserting straight sticks into branches for training purposes over time. With these materials readily available, it’s easier for anyone undertaking the art of wiring a Juniper Bonsai in order to create intricate styles that properly suit its growing environment over time.
Identifying the Right Time to Wire Your Juniper Bonsai

The timing of wiring a juniper bonsai is crucial. Depending on the growth rate, some may need to be rewired multiple times during the year; however, the best time for first-time wiring is early spring when the branches are still flexible and pliable from the winter dormancy. This ensures that the branch will take shape correctly with minimal breakage. Wiring too early can result in dead twigs as there won’t be enough sap flow yet to support them, while wiring too late will cause branches to become brittle and hard, resulting in possible damage or breakage during styling.
During this season of growth and activity in your bonsai tree, watch out for new shoots growing from dormant buds coming from older woody parts of your tree such as trunks or big branches. When they appear they must be wired promptly since they tend to grow quickly and thickly without losing its flexibility if wired right away before it becomes harder with age. Make sure not to wait until summer when their woodiness make them difficult or even impossible to wire without breaking off due to their stiffness.
Take note that if you let these fast growing shoots develop for longer than six weeks, it might be better not to bother with wiring at all because any work performed on them can increase stress on already developing structure instead of training its form more naturally over time like pruning alone would do in such cases.
Beginner’s Guide to Wiring a Juniper Bonsai
Wire training of juniper bonsai is a technique that produces dramatic results when it comes to shaping the bonsai. It allows the artist to reshape branches and trunks, effectively create its desired appearance. Wiring can seem intimidating for beginners but with patience and practice it will produce amazing results.
To start wiring your juniper bonsai, begin by selecting the tree you want to work with. Make sure the branch placement matches your vision or design that you have in mind before wiring commences. Choose flexible wire that will not damage the branches as you shape them into position. The size and length of wire depends on the thickness of each branch; using too large a diameter can cause injury or harm branches which should be avoided at all cost. Measure multiple times throughout process so there’s no guesswork involved in getting it right on the first attempt without needing corrections afterwards.
Once ready to begin wiring your juniper bonsai, start from the bottom up working towards trunk rather than vice versa; making sure you secure any branches once they are correctly placed since smaller wires are used for thinner branches while thicker or stronger cables may be needed for heavier parts like trunks due to their weight which require more support as they bend further away from original form. Keep track of time as leaving wires up too long can also lead to serious injury requiring complete removal of growth later on down line after fully matured shape has been achieved – stephanotis needs replacement every few weeks till desired look is achieved.
Steps to Properly Wire Your Juniper Bonsai

Wiring your juniper bonsai is a process that requires patience and skill. The techniques used are the same as those employed with all trees, though they must be adjusted to fit the needs of a smaller tree such as a bonsai. Before deciding when to wire your juniper bonsai, there are several steps that you should take to ensure success.
The first step in properly wiring your juniper bonsai is to assess the condition of the tree. Inspect its needles or leaves, branches and trunk carefully for signs of any damage or disease so it can be addressed before wiring takes place. If possible assess the weather conditions prior to beginning in order to determine whether wiring outside would put too much strain on your juniper bonsai due to environmental factors such as strong winds or extreme temperatures.
The next step when it comes time for wiring is selecting an appropriate size wire for each branch. If using anodized aluminum wire this may require thinner wires as compared to copper or brass which can be thicker and still remain flexible enough not bend or shape efficiently and effectively. Start by placing two pieces of wire across the width of each branch – one at each end – then wrap them around gently so they don’t cut into it while ensuring they stay in place securely enough not pop off from movement caused by windy conditions later on. Once set and secure, begin reshaping the branches very slowly over a period of time keeping track throughout their development until desired results have been achieved.
Finally after allowing for some settling time following what should be several weeks worth of careful shaping work, lightly misting water onto newly wired sections will help promote growth and allow you feel comfortable knowing that your juniper bonsai has been correctly wired with proper technique and will develop aesthetically pleasing curves without compromising its health over time.
Maintaining Your Wired Juniper Bonsai: Tips and Tricks
Maintaining your wired juniper bonsai is no small feat. Keeping the branches trained and in shape requires regular and careful attention to detail. Fortunately, there are a few useful tips and tricks that can help you maintain an attractive appearance while ensuring long-term health.
The first step to maintaining a wired juniper bonsai is knowing when it’s time for another wiring session. In general, wiring should take place every 1-2 years depending on how fast the branches grow. At least once a year, inspect the wiring job to determine if retightening or rewiring is needed–you may even need to perform minor trimming of old woody branches at this point as well. Be sure to do so with care; overworking any wires will damage the bark of your tree and stunt its growth potential.
Timing is also key when choosing wire size–wire gauge should be chosen based on the thickness of each branch you wish to train or bend since thicker wires can cut into trees much faster than thinner ones can which could cause injury in some cases. To avoid excess stress on newer growth, use thinner wire gauges (1mm – 2mm) while thickest wires (3mm – 6mm) should only be used on older branches that have developed ample strength and resilience over time due to proper pruning techniques being implemented during yearly maintenance sessions such as cutting back longer shoots before they become too unruly.
By following these few helpful tips, you’ll be able keep your juniper bonsai looking great without sacrificing its overall health or longevity.
Common Mistakes to Avoid When Wiring Your Juniper Bonsai

One of the most common mistakes made when wiring juniper bonsais is over-tightening. If a wire is wound too tightly around a branch, it can cause irreparable damage and deformations in your bonsai’s shape. You should also be careful not to twist or kink any branches as they can become damaged beyond repair as well. To prevent this, ensure that you are using wires that are flexible enough to wrap comfortably around the branch without squeezing it tightly.
Another mistake to watch out for is leaving the wires on for too long. A wire needs to be adjusted several times during the initial installation process and then removed once your desired shape has been achieved. Leaving wires on longer than needed will slowly strangle and weaken branches as they grow, creating an unsightly result or even killing off parts of your tree entirely. Thus, make sure that when you install a wire you are constantly checking its position and only leave it in place for as long as absolutely necessary.
Don’t forget about proper pruning techniques for junipers which play a large role in how your final design will look like after wiring adjustments have been made. Keep in mind that if you cut off too many branches at once or trim them down to stubs instead of leaves with active growth, then wiring won’t do much to help create attractive shapes since there won’t be much left to work with after pruning is done.
Leave a Reply